概要
- (たまたま寝れなかったので,) RenderMan で AO を計算するサンプルを手元で動かすようにしてみました.
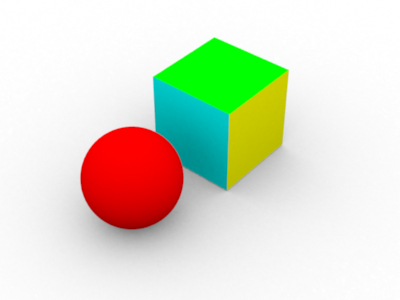
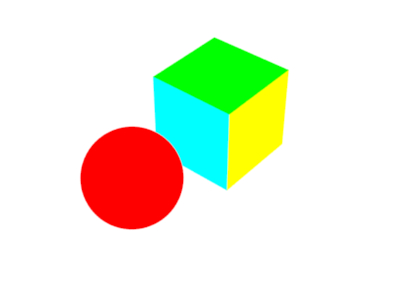
- 下図は RenderMan 準拠のレンダラ 3Delight で描画した結果です.
AO あり

AO なし

内容
- カメラから見える表面の各点において, AO (Ambient Occlusion)を計算してその結果をマテリアルのベースカラーに乗算しています.
- AO をシェーダで計算するときには, 表面の各点の法線方向を中心とした半球状にレイを飛ばして, シーンとそのレイがぶつかるかどうかを判定することを繰り返します.
- このとき, AO = (レイが衝突する回数) / (レイの総数) とすると, 埋まっている点だと AO = 1.0, 平面だと AO = 0.0 になります.
- なので, 最終出力時には( 1.0 - AO )の値をベースカラーに乗算します.
動作環境
- 無料版の 3DeLight Studio Pro Windows 64bit を使っています.
- サンプルは Pixar の Web 上の参考文献のほぼそのままで, 違いは シェーダで faceforward() を使っていて, またガンマ補正をしているくらいです.
3DeLight での実行手順
  // シェーダのコンパイル
  $ C:\Program Files\3Delight\bin\shaderdl.exe ao_gather.sl
  $ C:\Program Files\3Delight\bin\shaderdl.exe ao_occlusion.sl

  // rib を描画
  $ C:\Program Files\3Delight\bin\renderdl.exe test_ao.rib
コード
//////////////////////////////////////////////////
//
// ao_gather.sl
// AO を gather() で計算するシェーダ
//
//////////////////////////////////////////////////

surface ao_gather(float samples = 64)
{
    // 視点 I を向いている法線 Ns
    normal Ns = faceforward( normalize( N ), I );

    // レイの衝突回数
    float hits = 0;

    // 半球状のレイの飛ばし方
    gather( "illuminance", P, Ns, PI/2, samples, "distribution", "cosine" )
    {
        // 周囲にレイがぶつかった場合
        hits += 1;
    }

    // オクルージョンの値の計算
    float occlusion = hits / samples;

    // カラーに値を設定
    Ci = (1.0 - occlusion) * Cs;

    // 不透明度に値を設定
    Oi = 1;
}
//////////////////////////////////////////////////
//
// ao_occlusion.sl
// AO を occlusion() で計算するシェーダ
//
//////////////////////////////////////////////////
surface ao_occlusion(float samples = 64)
{
// 視点 I を向いている法線 Ns
normal Ns = faceforward( normalize( N ), I );
// 点 P, 法線 Ns 周りの AO
float occ = occlusion( P, Ns, samples );
occ = 0.0;
// カラーに値を設定
Ci = (1 - occ) * Cs * Os;
// 不透明度
Oi = Os;
}##################################################
#
# test_ao.rib
# AO を使ったシーンの描画
#
##################################################
FrameBegin 1
# フレームバッファの設定
Format 400 300 1
PixelSamples 4 4
ShadingInterpolation "smooth"
# Display "ao.bmp" "file" "rgba"
Display "" "framebuffer" "rgba"
# ガンマ補正
Exposure 1.0 2.2
# カメラの設定
Projection "perspective" "fov" 22
Translate 0 -0.5 8
Rotate -40 1 0 0
Rotate -20 0 1 0
# 可視性
Attribute "visibility" "camera" [ 1 ]
Attribute "visibility" "trace" [ 1 ]
Attribute "visibility" "photon" [ 0 ]
Attribute "visibility" "transmission" [ "opaque" ]
# レイトレース
Option "trace" "maxdepth" [ 3 ]
Attribute "trace" "maxdiffusedepth" [ 2 ]
Attribute "trace" "maxspeculardepth" [ 2 ]
# シーン
WorldBegin
Attribute "visibility" "trace" 0
Attribute "trace" "bias" 0.005
Attribute "visibility" "integer camera" [ 1 ]
Attribute "visibility" "integer trace" [ 1 ]
Attribute "visibility" "string transmission" [ "opaque" ]
# 使用するシェーダの選択
# Surface "ao_gather" "float samples" [ 64 ]
# Surface "ao_gather" "float samples" [ 256 ]
# Surface "ao_occlusion" "float samples" [ 64 ]
Surface "ao_occlusion" "float samples" [ 256 ]
# 白い床
AttributeBegin
Color [1 1 1]
Polygon "P" [ -5 0 5 5 0 5 5 0 -5 -5 0 -5 ]
AttributeEnd
# 赤い球
AttributeBegin
Color 1 0 0
Translate -0.7 0.5 0
Sphere 0.5 -0.5 0.5 360
AttributeEnd
# カラフルな箱
AttributeBegin
Translate 0.3 0.01 0
Rotate -30 0 1 0
Color [0 1 1]
Polygon "P" [ 0 0 0 0 0 1 0 1 1 0 1 0 ] # left side
Polygon "P" [ 1 1 0 1 1 1 1 0 1 1 0 0 ] # right side
Color [1 1 0]
Polygon "P" [ 0 1 0 1 1 0 1 0 0 0 0 0 ] # front side
Polygon "P" [ 0 0 1 1 0 1 1 1 1 0 1 1 ] # back side
Color [0 1 0]
Polygon "P" [ 0 1 1 1 1 1 1 1 0 0 1 0 ] # top
AttributeEnd
WorldEnd
FrameEnd
参考文献
-
- 3Delight Studio Pro
- "Global Illumination and All That" Pixar RenderMan

